はじめに
こんにちは、iOSアプリ開発グループの神山です。
SwiftUIについて絶賛勉強中なのですが、今回はUIKitでのUITableViewに相当するListの作成方法についてまとめてみました。
List
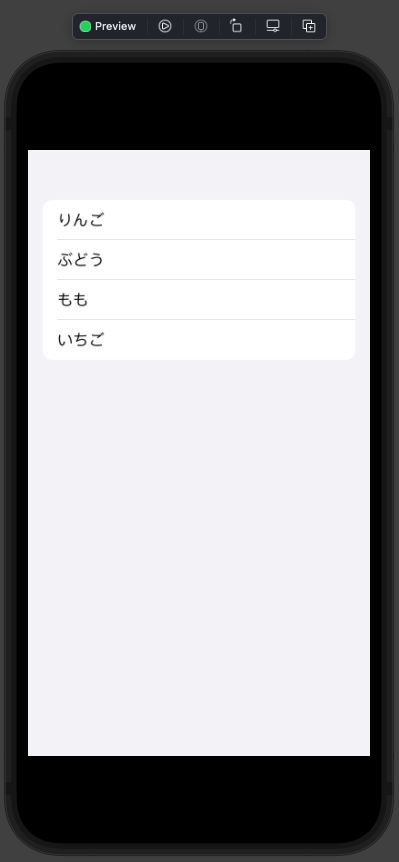
Listはデータの一覧を表示するのに適したコンポーネントです。 静的なデータを表示するだけなら以下のようなコードで簡単に表示することができます。
struct ContentView: View {
    var body: some View {
        List {
            Text("りんご")
            Text("ぶどう")
            Text("もも")
            Text("いちご")
        }
    }
}
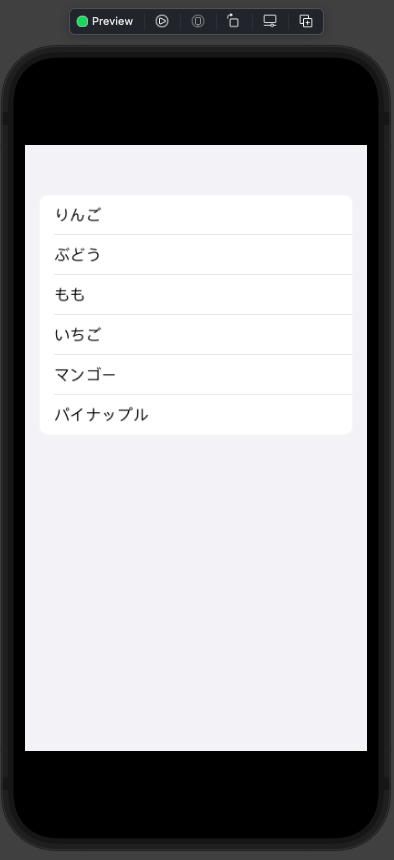
動的なデータの場合は
ForEachを使うことで一覧表示することができます。
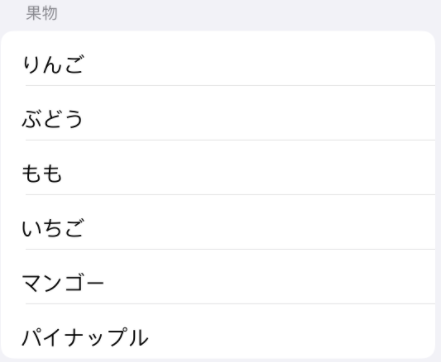
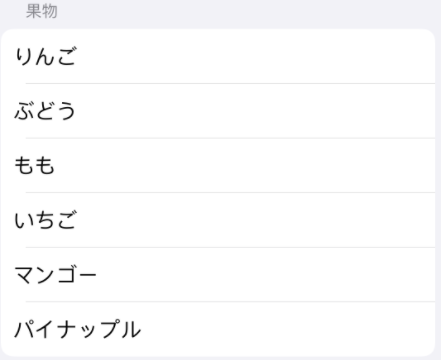
struct ContentView: View {
    private let fruits = ["りんご", "ぶどう", "もも", "いちご", "マンゴー", "パイナップル"]

    var body: some View {
        List {
            ForEach(fruits, id: \.self) { fruit in
                Text(fruit)
            }
        }
    }
}
ForEachを使用せずにListのみで表示することもできますが、行の削除や行の入れ替えの処理はできないため、単純な動的なデータを表示したい場合のみに使用できます。
struct ContentView: View {
    private let fruits = ["りんご", "ぶどう", "もも", "いちご"]

    var body: some View {
        List(fruits, id: \.self) { fruit in
            Text(fruit)
        }
    }
}
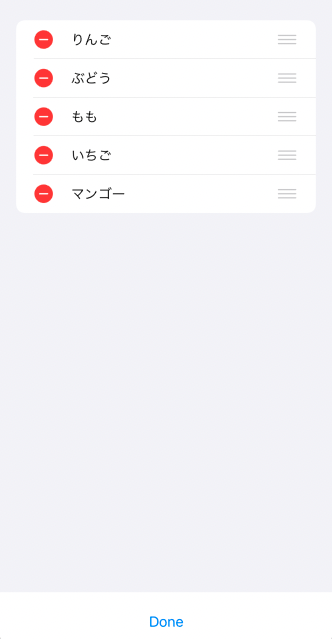
行の削除や行の入れ替えは
ForEachが準拠しているDynamicViewContent内のonDelete(perform:), onMove(perform:)を使用します。
struct ContentView: View {
    @State private var fruits = ["りんご", "ぶどう", "もも", "いちご", "マンゴー"]

    var body: some View {
        VStack {
            List {
                ForEach(fruits, id: \.self) { fruit in
                    Text(fruit)
                }
                .onMove { indexSet, index in
                    fruits.move(fromOffsets: indexSet, toOffset: index)
                }
                .onDelete { indexSet in
                    fruits.remove(atOffsets: indexSet)
                }
            }

            EditButton()
                .padding()
        }
    }
}
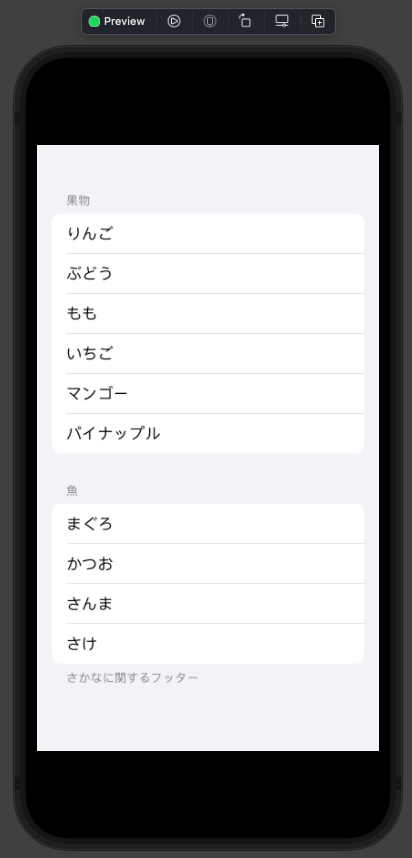
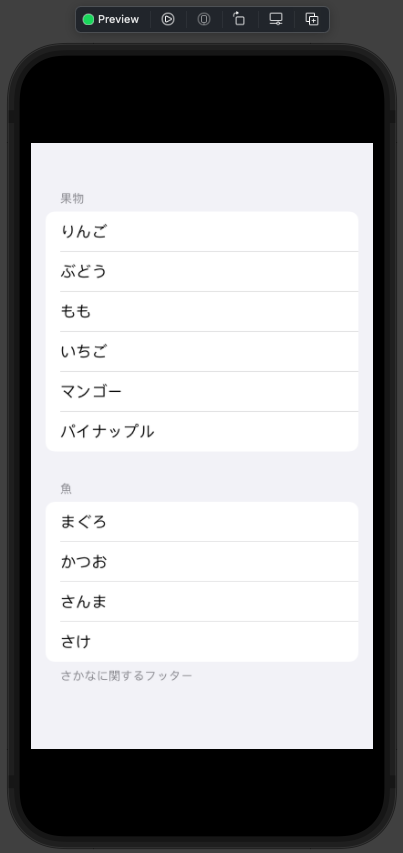
Listのカスタマイズ
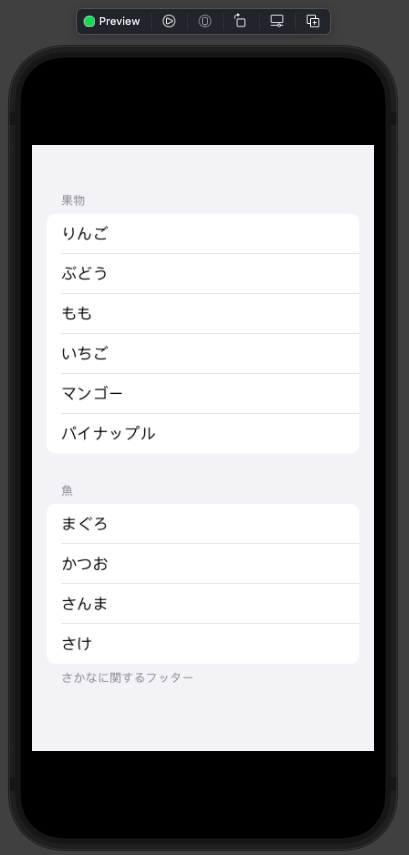
Sectionを使用することでListのグループ化を簡単に行うことができます。
以下では
Sectionを使用してヘッダー、フッターをつけたListを作成しました。
struct ContentView: View {
    private let fruits = ["りんご", "ぶどう", "もも", "いちご", "マンゴー", "パイナップル"]
    private let fishes = ["まぐろ", "かつお", "さんま", "さけ"]

    var body: some View {
        List {
            Section(header: Text("果物")) {
                ForEach(fruits, id: \.self) { fruit in
                    Text(fruit)
                }
            }
            Section(header: Text("魚"), footer: Text("さかなに関するフッター")) {
                ForEach(fishes, id: \.self) { fish in
                    Text(fish)
                }
            }
        }
    }
}
Modifier
List、Sectionに関するModifierをご紹介します。
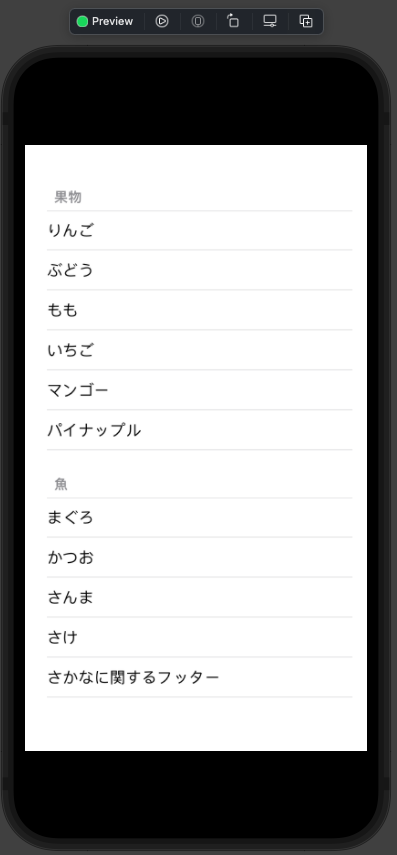
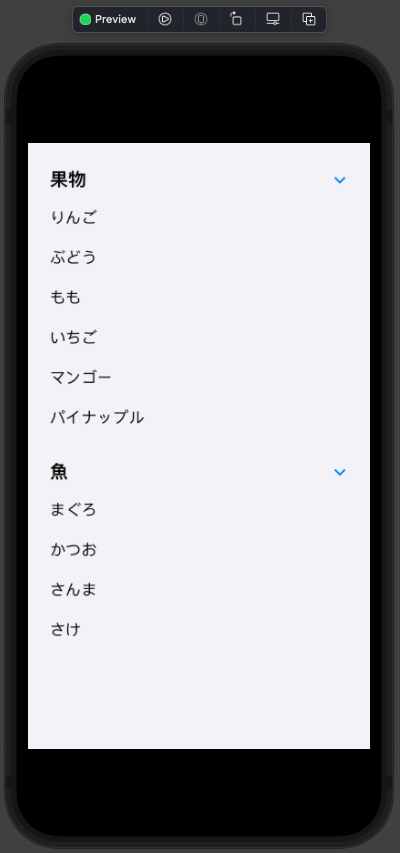
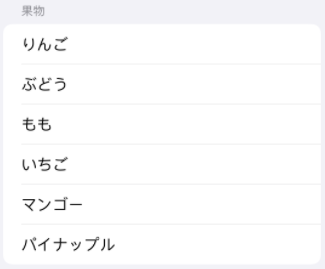
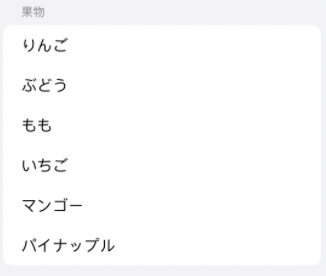
listStyle(_: ListStyle)Listの表示スタイルの指定
| automatic | plain | grouped |
|---|---|---|
 |
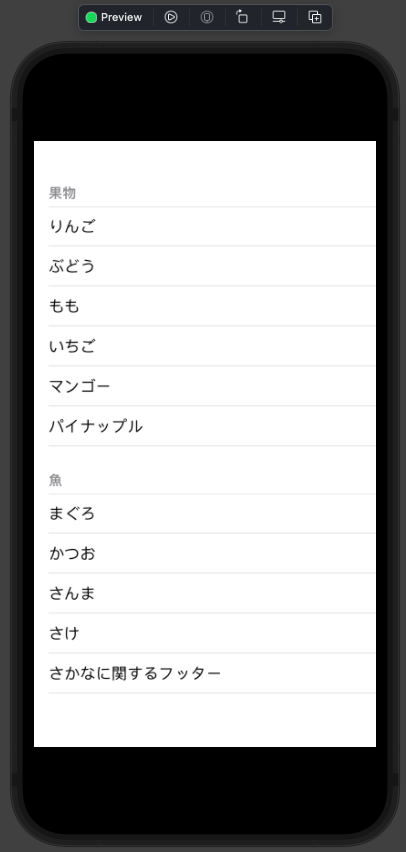 |
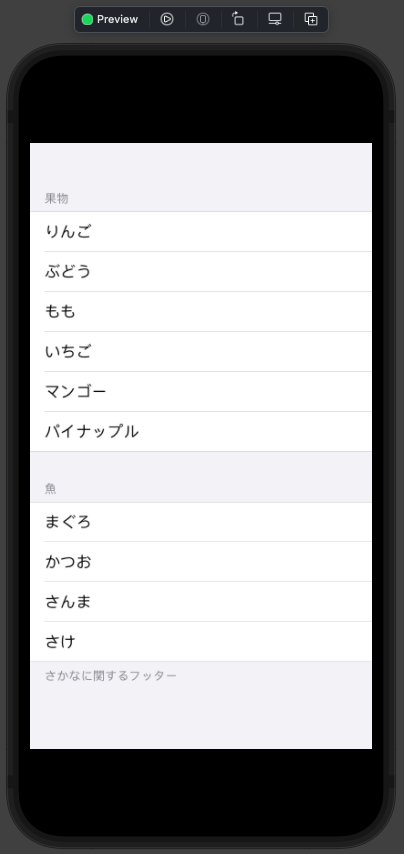 |
| inset | insetGrouped | sidebar |
|---|---|---|
 |
 |
 |
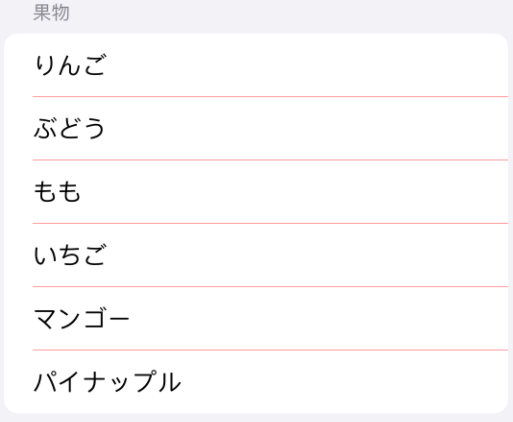
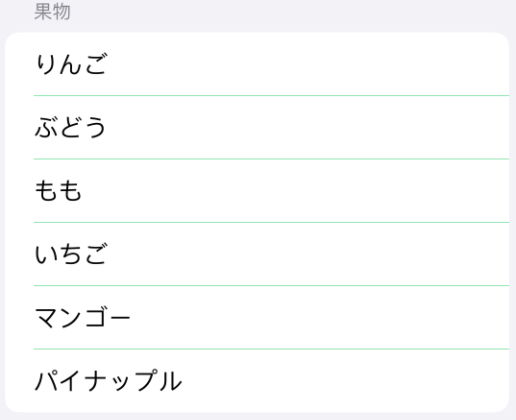
listRowSeparator(visibility, edges: VerticalEdge),listSectionSeparator(visibility, edges: VerticalEdge)セパレーターの表示可否の指定
| visible(default) | hidden |
|---|---|
 |
 |
listRowSeparatorTint(color, edges: VerticalEdge),listSectionsSeparatorTint(color, edges: VerticalEdge)セパレーターの色の指定
| red | green |
|---|---|
 |
 |
listRowBackground(_: View)背景の指定
| blue | yellow |
|---|---|
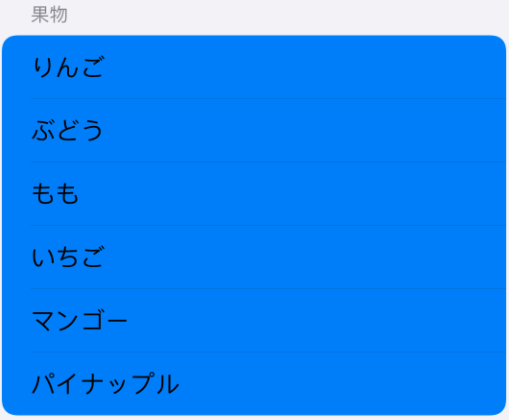 |
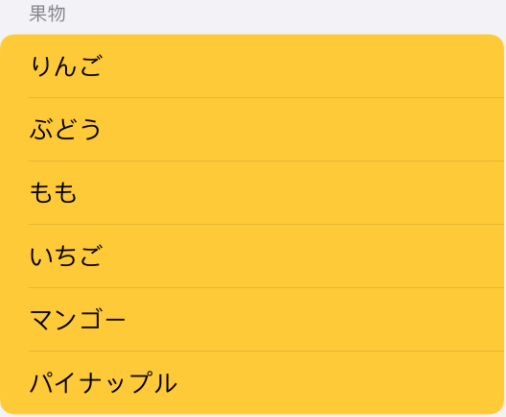 |
listRowInsets(_: EdgeInsets)余白の指定
| top10 | left10 | bottom10 | right10 |
|---|---|---|---|
 |
 |
 |
 |
Listのタップ処理
List内のアイテムにタップ処理を追加するには
onTapGesture()のModifierを使用します。
Listをタップした際に画像とテキストを更新するようにしてみます。
struct Fish: Hashable {
    var isExpire: Bool = false
    var name: String
}

struct ContentView: View {
    @State private var fishes: [Fish] = [
        Fish(name: "まぐろ"),
        Fish(name: "かつお"),
        Fish(name: "さんま"),
        Fish(name: "さけ")
    ]

    var body: some View {
        List {
            Section(header: Text("魚")) {
                ForEach(0..<fishes.count, id: \.self) { index in
                    Label(
                        fishes[index].isExpire ? "\(fishes[index].name): 賞味期限切れ" : fishes[index].name,
                        systemImage: fishes[index].isExpire ? "trash.circle.fill" : "hand.thumbsup.fill"
                    )
                    .onTapGesture {
                        fishes[index].isExpire.toggle()
                    }
                }
            }
        }
    }
}
| タップ前 | タップ後 |
|---|---|
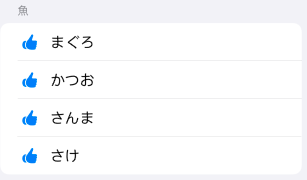 |
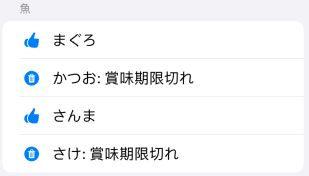 |
また、
contentShape(_:)とSpacer()を組み合わせることでタップ領域を全体に広げることができます。
var body: some View {
    List {
        Section(header: Text("魚")) {
            ForEach(0..<fishes.count, id: \.self) { index in
                HStack { // 追加
                    Label(
                        fishes[index].isExpire ? "\(fishes[index].name): 賞味期限切れ" : fishes[index].name,
                            systemImage: fishes[index].isExpire ? "trash.circle.fill" : "hand.thumbsup.fill"
                    )
                    Spacer() // 追加
                }
                .contentShape(Rectangle()) // 追加
                .onTapGesture {
                    fishes[index].isExpire.toggle()
                }
            }
        }
    }
}
さいごに
一覧表示するために使用されるListは、どのようなアプリを作る際でも使う可能性が高いコンポーネントでもあるため、上手く使いこなせるように今後も調べていこうと思います。
最後まで記事を読んで頂き、ありがとうございました。
参考文献
神山義仁
iOSエンジニアです。